


Projector Print Your Patterns
Projecting digital sewing patterns directly onto fabric is the latest trend in our sewing world. Projecting your patterns directly onto the fabric will save you time and paper. In general, patterns created in Wild Ginger programs are already compatible with projector printing. They just need to be printed to a PDF driver instead of a printer. This article provides general information, tips, and resources on projector printing patterns.
NOTE: Not all projectors can read all PDF files. You will need to consult the documentation for your projector for calibration and file format compatibility
NOTE: Large format paper sizes for projector printing can be created in the Windows Print Server Properties. PDF files for projector printing are typically AO size - approximately 33.1 x 46.8 inches or 841 x 1189 mm. Recommended sizes may vary by projector. Likely a paper size of 36 X 48 inches (915 X 1220 mm) will work. Check with the company that makes your projector for additional details. The goal is to create a paper size large enough that all patterns will fit inside the paper grid and not cross pages.
NOTE: Microsoft Print to PDF ships with Windows 11. However, it may not allow larger paper sizes. You may need to install another PDF driver to create PDFs in large format for plotters or projector printing.
See the following Wild Ginger articles for additional information. See also the list of Additional Resources below.
Projecting Printing Patterns from Wild Ginger Programs
- Creating your patterns as desired in any Wild Ginger program.
- Before prining your patterns to the PDF file, add a calibration square to the patterns. PatternMaster programs can automatically add a calibration square. For Cameo, use the Rectangle tool to draw a square the desired size.
- Choose to print your patterns as you normally would choosing a PDF driver as your printer.
- Set the paper size to a large format page size such as AO that will allow all of the patterns to fit inside the page grid.
- Position your patterns on the page inside the page grid. Rotate or flip patterns as needed.
- Choose the Bold line width and set All to Black to make it easier to see the patterns when projected.
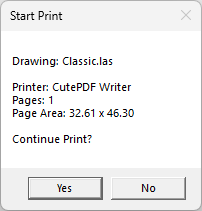
- Press the Print button. The program will display the number of pages to print and the page size.
- CutePDF will display a dialog box to name the PDF file. Enter a name for your file, browse to the location to save it and press Save to create the file.

Select PDF driver
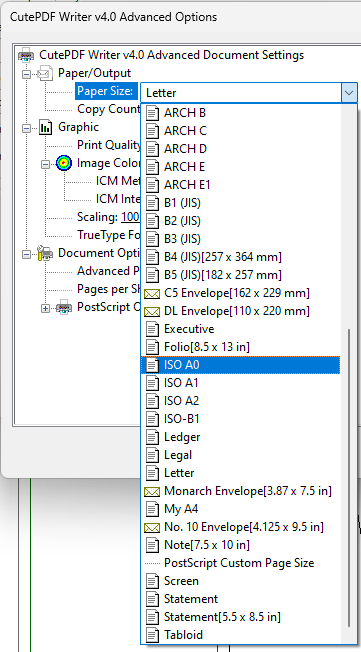
Select Page Size
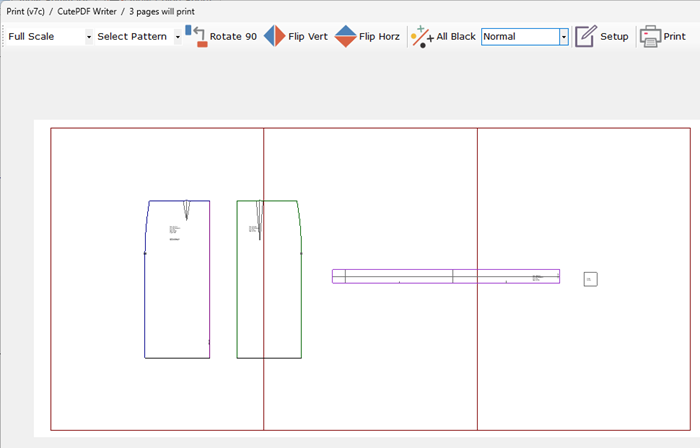
Wild Ginger Print Screen Before
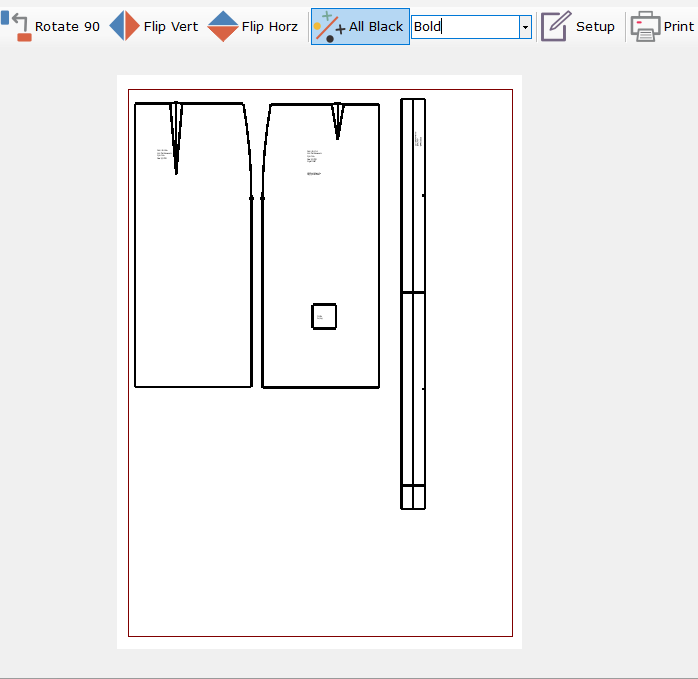
Wild Ginger Print Screen After
Print to PDF

PDF file open in Adobe Reader