


Custom Paper Sizes
If you have a large format printer or plotter or your printer has tractor feed or banner capabilities or you wish to create PDF patterns for projector printing, you can set custom paper sizes for the PDF writer using the Print Server Properties for devices and printers. You can also create custom paper sizes to use when creating PDF files that will be printed in another location such as a Fedex/Kinkos or a plotter connected to a different computer.
NOTE: Maximum paper length possible will vary from driver to driver. Some will print as long as 44” and some will stop at 22”. If you enter a measurement that is too long for your particular printer driver, a message box will appear telling you the length is too long. You may have to experiment with various paper lengths to optimize printing. Printing width will be determined by the printer or plotter that you are using. Widths can range from 8.5” to 74”.
NOTE: Custom paper sizes that you create here can be used when printing directly to printers and plotters that are connected to your computer and for printing to PDF.
NOTE: Paper sizes for projector printing can also be created here. PDF files for projector printing are typically AO size - approximately 33.1 x 46.8 inches or 841 x 1189 mm. Recommended sizes may vary by projector. Likely a paper size of 36 X 48 inches (915 X 1220 mm) will work. Check with the company that makes your projector for additional details. The goal is to create a paper size large enough that all patterns will fit inside the paper grid and not cross pages.
NOTE: Microsoft Print to PDF ships with Windows 11. However, it may not allow larger paper sizes. You may need to install another PDF driver to create PDFs in large format for plotters or projector printing. See our articles on Installing a PDF Driver for additional details.
To set custom paper sizes:
- Choose Devices and Printers from the Control Panel.
- Choose Printers and Scanners on the Bluetooth and Devices screen.
- Scroll down to Related Settings and choose Print server properties.
- Once the Print Server Properties screen appears, check the Create a new form check box.
- Enter a form name for your new paper size. Be certain to enter a name that is NOT already on your computer.
- Select the Units - Metric or English.
- Enter the Width and Height for the new paper size.
- Press the Save Form button.
- You can create as many sizes as you want.
- Close the screen when you are finished creating paper sizes.
NOTE: Terminology may vary among the various versions of Windows. If you do not see the steps above, try searching for Print Server Properties in Windows Search.
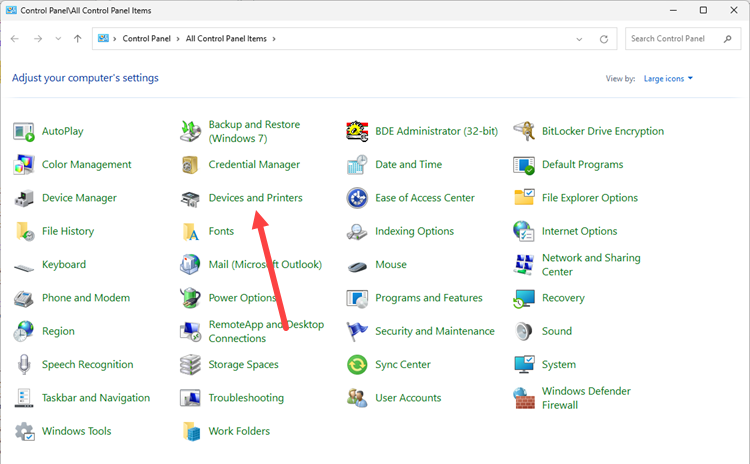
Control Panel - Devices and Printers
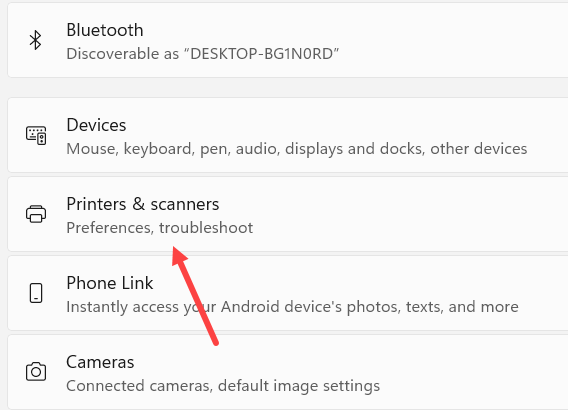
Bluetooth and Devices
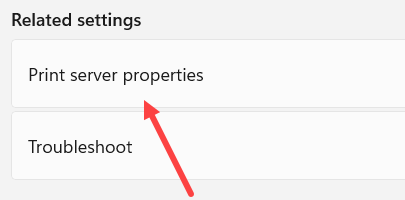
Print Server Properties
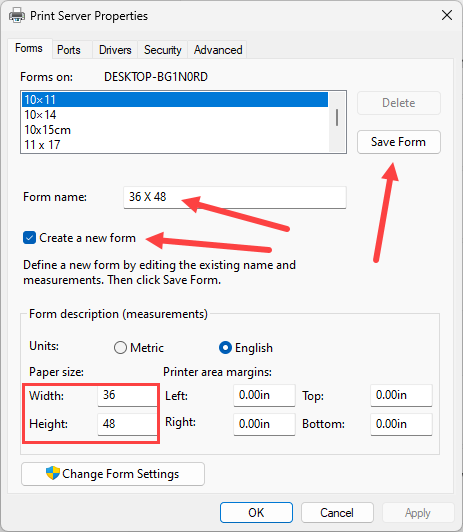
Custom Paper Sizes screen