Pants Fitting Guide
NOTE: please do not make changes to the default settings unless advised to by Wild Ginger support. Do not try to guess changes you would need to make to the pants until you have tried them on.
The pants fitting garment should be a close fitting wearable pant. It drafts with a slim cut leg. If the pant leg too is snug, do not worry. This can be changed with your hem and knee settings. The hip line must be level on the body.
NOTE: if the pants are too tight in the hips, stop sewing and contact support@wildginger.com. We are not able to judge fit on pants that are too tight. You should be able to pinch ease at hip level.
CLICK HERE for instructions on obtaining assistance with fitting issues
To begin the pants fitting process:
- Take, enter, and save your measurements.
- Go to Fit Garments.
- Select Pants on the Fit Garments screen.
- Use the default ease settings: waist ease - .75, hip ease - 2.5, crotch ease - .5
- Set crotch shape to Round for both front and back.
- Do NOT select the Wild Cut.
- Sew your fit garment in a light-colored light weight fabric - NO prints or patterns.
- Mark the hip, crotch and knee level on the pants before sewing (as shown below). Use a dark marker that will be visible in a photo.
- Review the guide sheet that is generated for your fit garment.
- Do not make any alterations to the patterns before sewing them.
- Insert a zipper in either the center front or center back seam.
- Trim and clip the crotch curves.
- Sew on the waistband.
- Press a crease in both the front and back pant legs.
- Try on your pants and take a FRONT view, BACK view, and SIDE view photo.
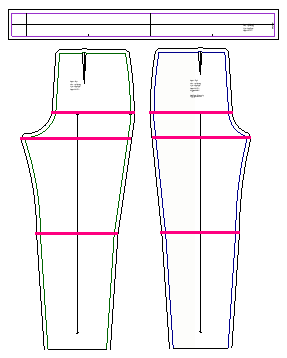
These pictures show a pair of marked fitting pants. The marks added at the waist show the planned waist drop. The Hip line must be level on the body for the pants to hang correctly.

When the hip line dips in front, there will be bagging in the front crotch. Level the hip line. The front is adjusted at the waist using the front waist drop setting.
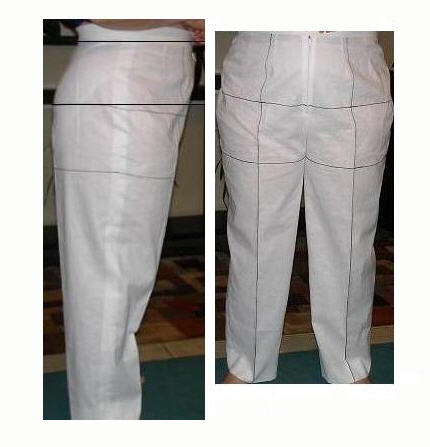
When the hip line is pulled up in front, there will be bagging in the back leg. Level the hip line. Raise the front waist using the front waist drop setting. Also, check the waist circumference. It may be smaller than needed and the pants are being pulled over the tummy to a smaller circumference. Enter the pants waist circumference in Pants Defaults.
(When a chart is saved for the first time, the natural waist circumference is entered at the Pants Waist Default. The only way to change this is in Defaults. Changing the natural waist in the measurement chart does not change the pants waist once it have become a default)
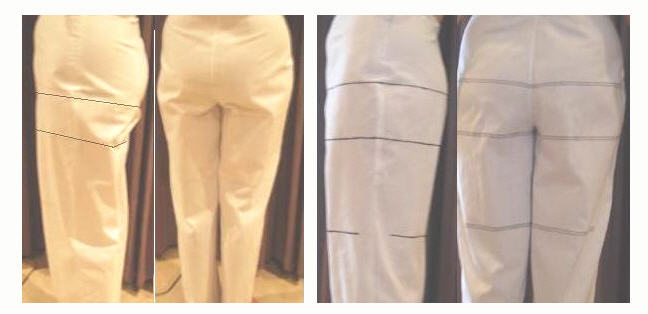
The lower back darts are set in Defaults. Looking at this picture it appears in the side view the hip circumference is above the line marked on the pants. Looking at the back view you can see the hip circumference is lower. The hip depth should be low, in the seam area. When you sit that is where ease is needed. The lower back dart length is based on the side view. The fuller the hip, the shorter the back darts will be. (In this picture the hip needs to be leveled to remove the small poof in the front crotch.
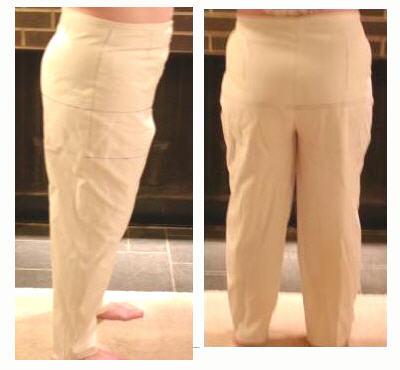
These pants are tight in the thigh below the hip. There are horizontal pulls, sometimes called "whiskers". These front hip line is also dipping slightly.
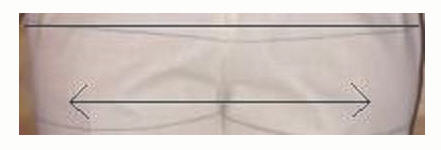
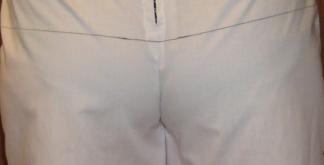
Wedgie? This is what a Wedgie looks like. To fix this, increase the crotch length. This will increase the distance from waist to crotch level and the crotch will not pull into the body.
