


Drafting a Dartless Knit Sloper
The dartless knit sloper can be used to create fitted tee shirts, leotards, bodysuits, and other activewear styles sewn in stretchy knits. The back is completed first and then used to create the front. For women's styles, part of the side bust dart is rotated into the armhole increasing the size of the front armhole. Raising the armhole and sloping the shoulder seam provides some shaping in the bust area. Fabric stretch will replace some of the shaping provided by the bust darts but dartless knit garments will not mold to the bustline quite the same as garments with bust darts. Wrinkles will may form in the armhole/sideseam area if the bust is large.
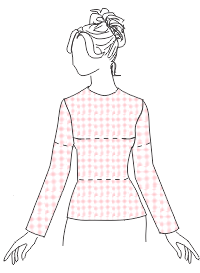
Dartless Knit Sloper
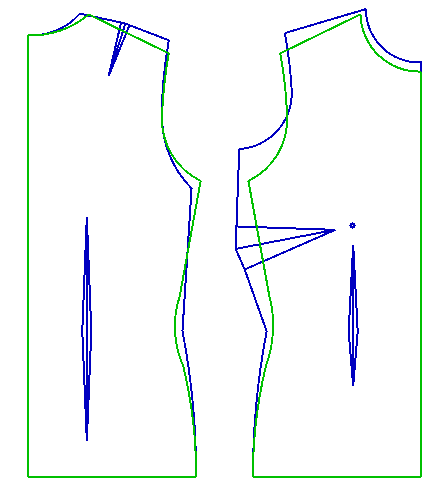
Woven Sloper (Blue) vs Knit Sloper (green)
Draft the Patterns
In PatternMaster, choose the following style options and settings:
- classic style
- no front and back closure
- front and back jewel neckline
- set in sleeve
- set chest, waist, and hip ease to 0
- set seam allowances to 0
- Save the patterns and then choose Open Patterns in Pattern Editor.
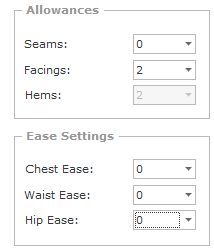
Figure 1. Settings
Create the Back Pattern
- Choose File/Save As (FA) and save the file as Dartless_Sloper in the Patterns/FitGarments folder.
- Select and delete the front and the objects on the back shown in Figure 2.

Figure 2. Select and delete objects
- To widen the back neckline, choose Move Point (MP) and SNAP to the right end point of the neckline.
- Hold the CTRL key down and drag the mouse to the right.
- Enter 0.5 (1.25 cm) and press ENTER.
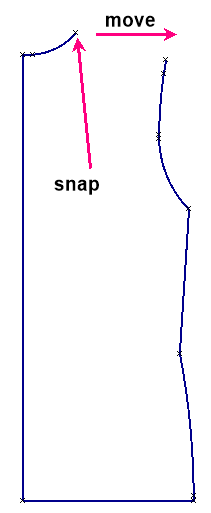
Figure 3. Move the neck point
- To drop the shoulder line, select the upper armscye curve and choose Locate Points (LP).
- SNAP to the top point of the armhole curve.
- Enter 0.75 (2 cm) and press Apply to locate the point.
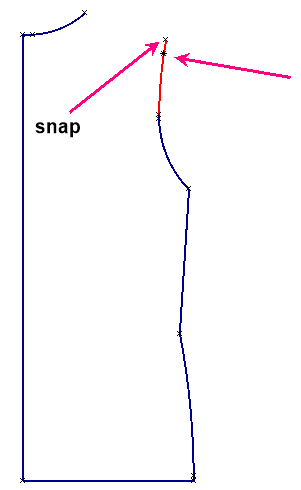
Figure 4. Locate point on upper armscye curve
- Choose Line (LI) and draw the new shoulder line as shown from the neck point to the standard
point placed on the upper armscye curve.
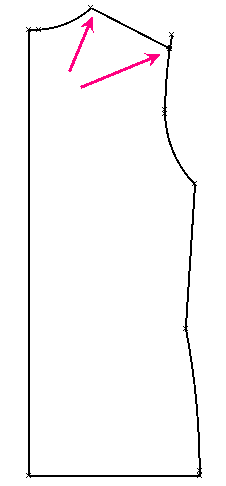
Figure 5. Draw the shoulder line
- Select and delete both armscye curves.
- To increase the width across the back chest, choose Move Point (MP) and SNAP to point 1, the top of the sideseam.
- Hold the CTRL key down (or use the built in trap angle) and drag the mouse to the right.
- Release the CTRL key and type 0.5 (1.25 cm) on th keyboard and press ENTER.
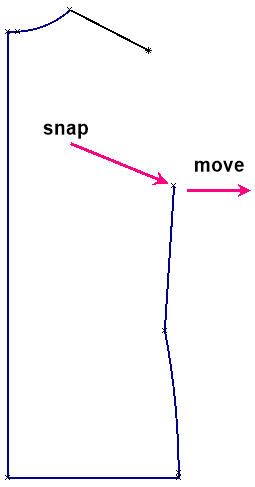
Figure 6. Move sideseam point
- To raise the armhole, select the sideseam and choose Locate Points (LP).
- SNAP to the point 1a the top point of the sideseam.
- Enter -0.5 (-1.25 cm) and press Apply.
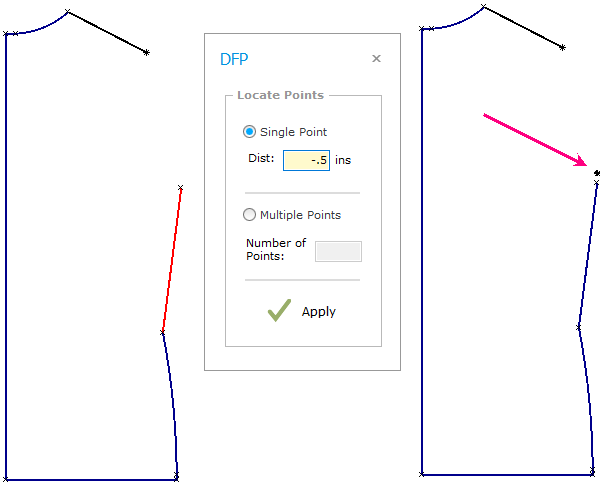
Figure 7. Locate point above sideseam
- Choose Move Point (MP) and SNAP to the top point of the sideseam and SNAP to the point just placed.
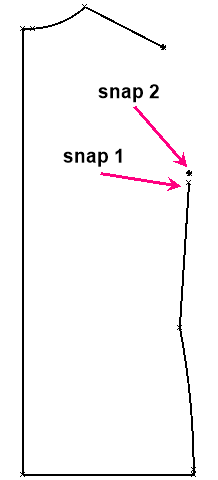
Figure 8. Move point
- Select and delete the two standard points just placed.
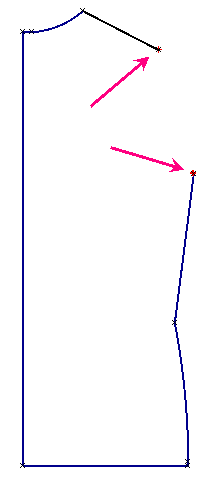
Figure 9. Delete standard points
- Choose Arc (AR) and SNAP to point 1 the top of the sideseam.
- CLICK to place point 2.
- Hold the CTRL key down and drag the mouse down.
- Release the CTRL key and type 0.25 on the keyboard and press ENTER to place point 3.
- Choose Arc (AR) and SNAP to the point 4 the end point of the shoulder line.
- SNAP to point 2.
- Drag the mouse to shape the arc as desired and CLICK to place point 5.
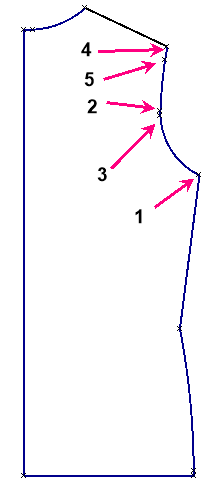
Figure 10. Draw armscye curves
- Select the sideseam and choose Locate Points (LP).
- SNAP to waist point.
- Enter 2 (5 cm) and press Apply.
- Repeat to locate a point on the hip curve.
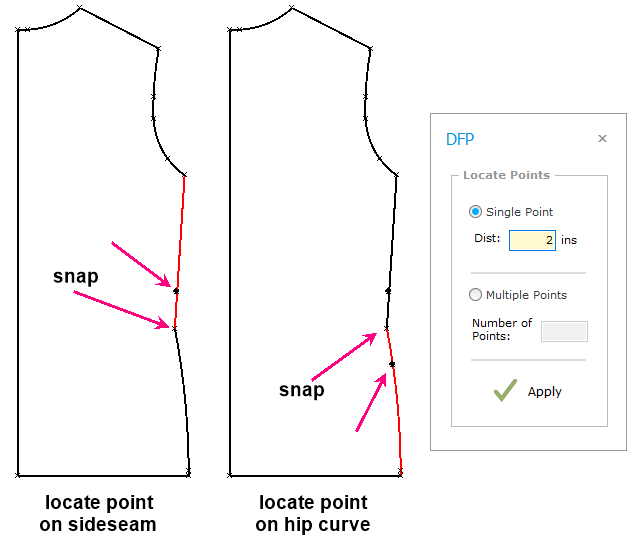
Figure 11. Locate point on sideseam and hip curve
- Choose Move Point (MP) and CLICK on the sideseam.
- SNAP to point 1 and then snap to point 2 the upper standard point.

Figure 12. Move the sideseam point
- Choose Move Point (MP) and CLICK on the hip curve.
- SNAP to point 1 and then snap to point 2 the lower standard point.
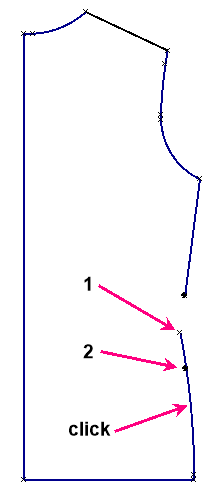
Figure 13. Move the hip curve point
- Select and delete the two standard points.
- Choose Arc (AR) and draw the waistline curve shaping as desired.
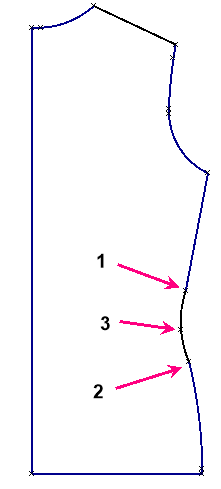
Figure 14. Redraw the waistline
- Choose File/Save (FS) to save the patterns.
Create the Front Pattern
- Select the back pattern as shown.
- Choose Copy (CO), enter 1 for the number of copies and press Apply.
- Drag the mouse to the right and CLICK to place the copy.
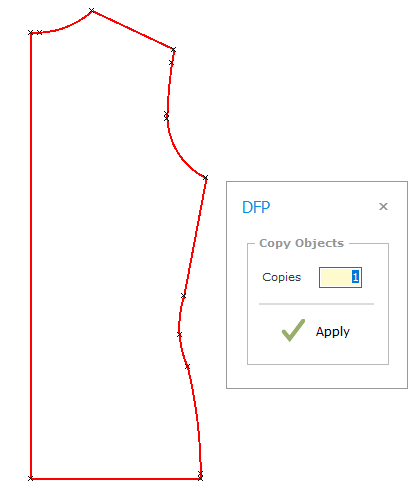
Figure 15. Select and copy the back pattern
- Select the front as shown and choose Flip Vertical (FV).
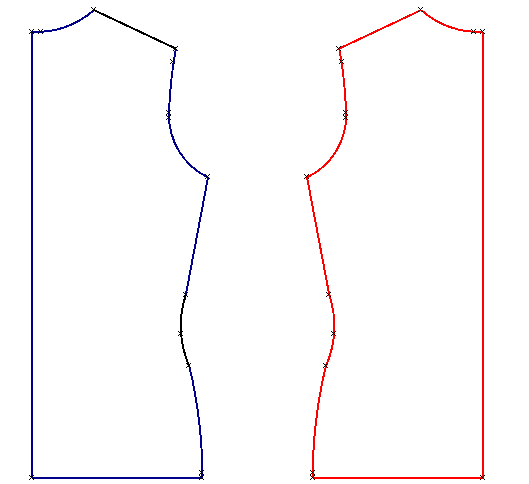
Figure 16. Flip vertical
- Select and delete the front neckline.
- To lower the front neckline, select the center front line and choose Locate Points (LP).
- SNAP to point 1.
- Enter 2 (5 cm) and press Apply.
- Choose Move Point (MP) and SNAP to point 1 and then SNAP to point 2.
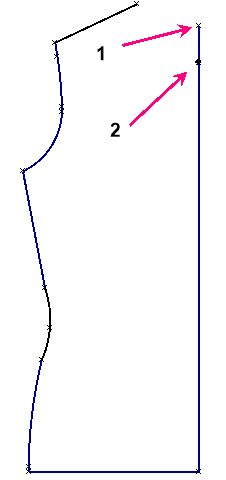
Figure 17. Locate point on center front
- Select and delete the standard point placed on the center front line.
- To draw the front neckline, choose Arc (AR).
- SNAP to point 1 and then SNAP to point 2.
- Hold the CTRL key down and drag the mouse to the left.
- Release the CTRL key and type 0.25 (.6 cm) on the keyboard and press ENTER.
- Choose File/Save (FS) to save the patterns.
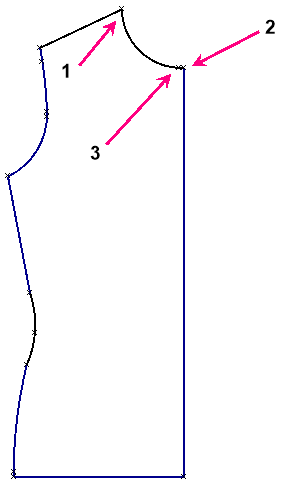
Figure 18. Redraw the front neckline

Figure 19. The final patterns