


Triple Darted Tee Shirt
I found the idea for this shirt in a issue of Australian Stitches magazine. This style has three darts radiating out from the right sideseam. This project can be completed in any PatternMaster program. The fabric shown is a lightweight stable polyester knit. This style can be created with an armscye dart and most any neckline. The darts can also be stitched on the outside of the fabric for a different look. I have adapted the pattern making instructions for our PatternMaster Pattern Editor or Cameo Pattern Design.
Draft the Patterns
To make this style, launch PatternMaster and go to the Blouses, Tops, Shirts, or Activewear screen depending upon the program you are using. Make the following style options and settings.
- Boutique: Blouses - classic, tee shirt, or sleeveless
- Knits: Tops/Sheaths/Jackets - classic, tee shirt, or sleeveless
- Child’s Play: Tops - classic, tee shirt, or sleeveless
- Curves: Activewear - classic, tee shirt, or tank
- Tailor Made: Shirts - classic, tee shirt, or tank
- Neckline - front and back scoop neck
- Closure - no closure for knit fabrics; back closure for woven fabrics
- Waist Fit - Fitted
- Hemline Sweep - Straight
- Darts - none
- Sleeves - your choice, if sleeveless was not selected
- Neckline Shape - reshape front and back neckline, if desired
- Length - set as desired
- Front and back neck depth and neck width - set as desired (just make sure the neck is wide enough and low enough to go over your head. We chose a front and back neck depth of 3 inches (7.5 cm) and a neck width of 2 inches (5 cm) and 2 1/2 inches (6 cm) of ease for the chest and hips
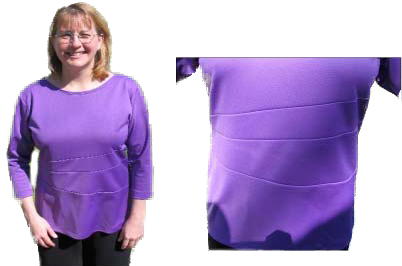
Triple Darted Tee
Save the Style
- Save the style as Triple Darted Tee Shirt. Your patterns should look something like the patterns in Figure 1.
- Open the patterns in the Pattern Editor.
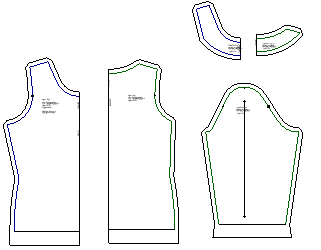
Figure 1. Make and save the patterns
Create the Darts
- Select and delete all of the patterns except the front.
- Choose Save As from the File menu and enter Triple Darted Tee Shirt Front for the file name and save it.
- Select the Front and choose Ungroup (Ctrl U).
- Select and delete the seam allowances (Fig. 2).
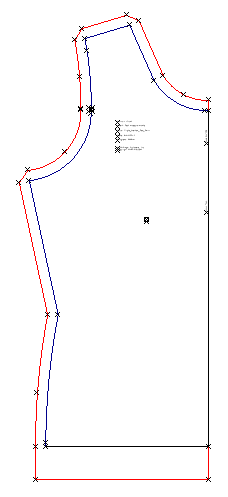
Figure 2. Select and delete seam allowances
- Select the front pattern and mirror (MI) on the center front line (Fig 3).
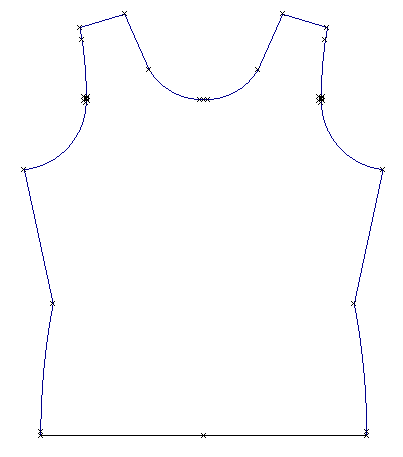
Figure 3. Mirror the front
- Press the Save (FS) button.
- Locate the following points using the Locate Points (LP) tool (Fig. 4).
Left Sideseam
- 2.5 inches (6.5 cm) down from armhole
- 6 inches (15.25 cm) down from armhole
- 3 inches (7 cm) down from waist point on the hip curve
Right Sideseam
- 1 inch (2.5 cm) up from waist point
- 2.5 inches (5 cm) up from waist point
- 1 inch (2.5 cm) down from waist point on the hip curve
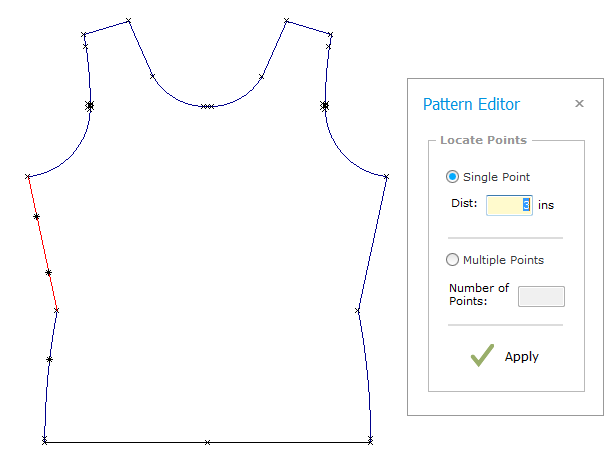
Figure 4. Locate points on sideseams
- Connect the points placed with lines as shown Figure 5.

Figure 5. Connect the points on the sideseams
- Use the Scissors tool to break the sideseam exactly at each point placed.
- Press the Save (FS) button.
- Select the objects as shown in Figure 6 and choose the Rotate by Units tool.
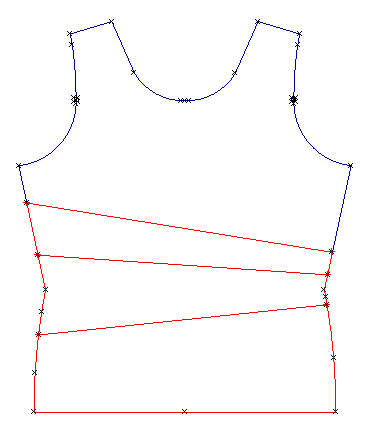
Figure 6. Select objects to rotate
- Snap to the top point placed on the right sideseam. Snap to the top point placed on the left sideseam.
Enter 2 for the distance, choose counter clockwise and press the Apply button (Fig. 7).
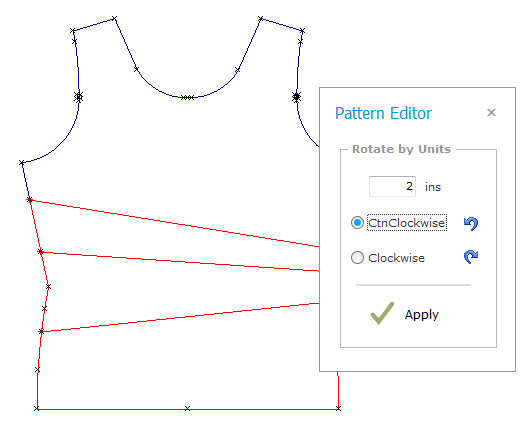
Figure 7. Rotate by Units
- Select the objects as shown in Figure 8 and choose the Rotate by Units tool. Snap to the middle point placed on the
right sideseam. Snap to the middle point placed on the left sideseam. Enter 2 for the distance, choose counter
clockwise and press the Apply button.
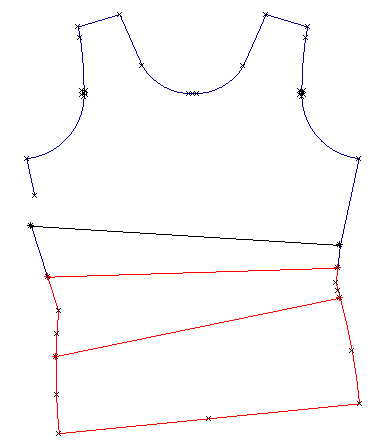
Figure 8. Rotate by Units
- Select the objects as shown in Figure 9 and choose the Rotate by Units tool. Snap to the bottom point
placed on the right sideseam. Snap to the bottom point placed on the left sideseam. Enter 2 for the distance,
choose counter clockwise and press the Apply button.
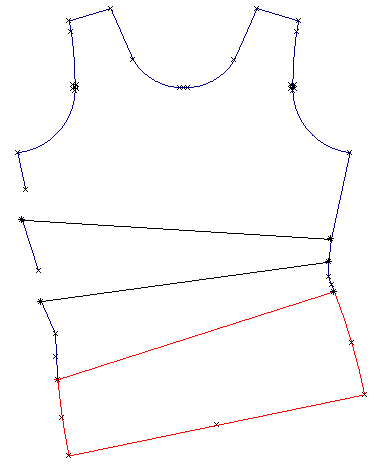
Figure 9. Rotate by Units
- Draw lines to connect the new openings on the left sideseam with points on the right sideseam (Fig. 10).
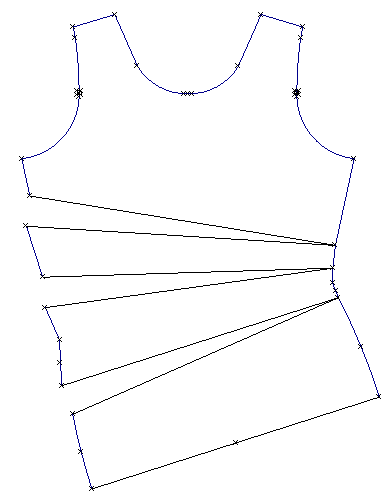
Figure 10. Connect the points a shown
- Press the Save (FS) button.
- Choose the True Dart tool to true each opening (Fig. 11).
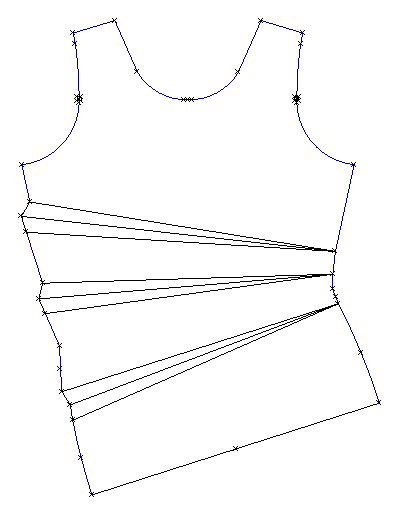
Figure 11. True the darts
- Use the Offset and Intersect tools to add seam allowances (Fig. 12).
- Draw an exactly horizontal line down the center of the pattern for a grainline (Fig. 12).
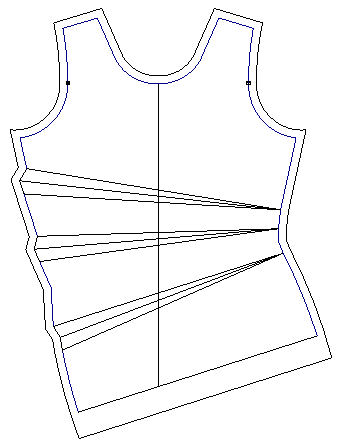
Figure 12. The finished front pattern
- Merge the original patterns and select and delete the original front pattern, group each pattern, if needed, and print.
- Press the Save (FS) button.