Adaptive Clothing Patterns
Adapting clothing for individuals with limited mobility, injuries, or those confined to wheelchairs can be challenging. Wild Ginger Software's PatternMaster programs provide many options for drafting patterns for specific physical needs.
Limited Mobility or Injury
For people with limited mobility or injuries, dressing can be difficult and painful. Following are suggested pattern changes, style options, and fit and design settings to make dressing easier.
Top/Dresses/Jackets
- Front and back closures can be set independently. The shoulder placket, back placket, and back overlap closures make dressing easier.
- Choose the center placket sleeve with the shoulder placket to open the garment completely from neck to sleeve hem. The center placket sleevecan also be used to accomodate prosthesis, casts, and fixators.
- The side placket top allows the top to open completely from the sideseam at armscye to the hem. If a sleeve is chosen, a placket will also be drafted along the underarm of the selected sleeve to allow the sleeve to open completely from sleeve hem to armscye.
- For garments that go over the head, increase the front and back neckline depth settings for the jewel neck. The back gusset closure is also useful for allowing extra room for the garment to go over the head.
- Use plastic snaps, magnetic closures, or hook and loop tape instead of buttons.
- Choose the convertible sleeve length option to make a sleeve that can be short or long. A sleeve gusset can also be useful to improving mobility.
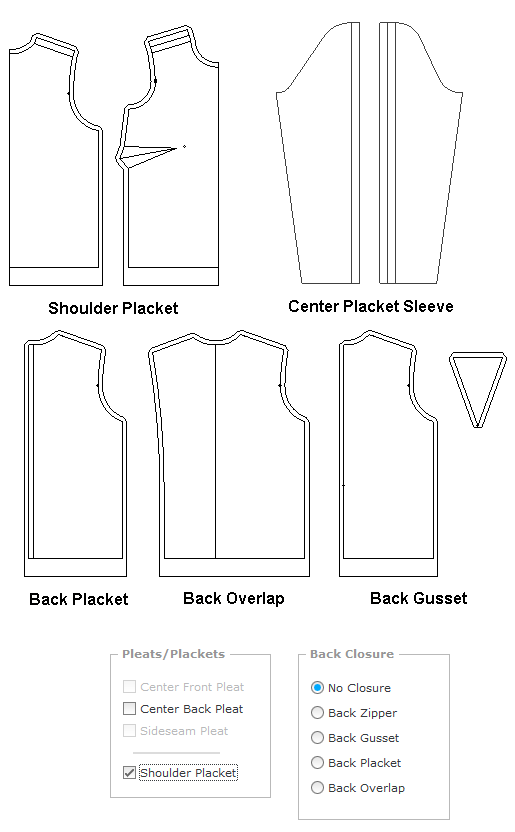
Front and Back Closures
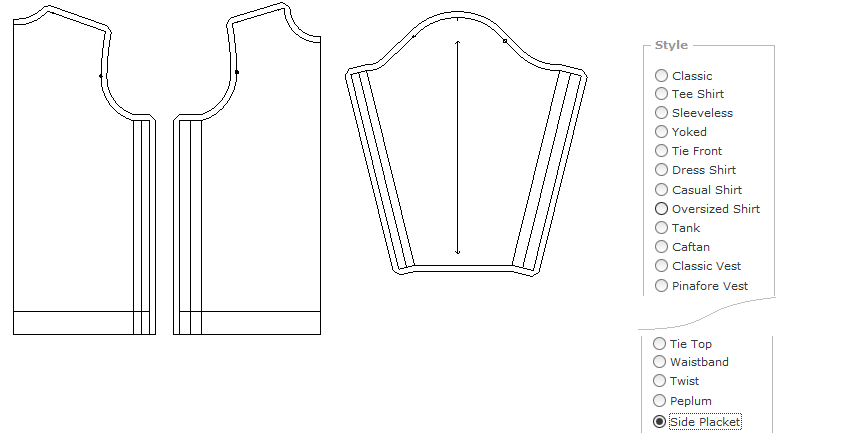
Tops, Dresses, and Jackets Sideseam and Underarm Plackets
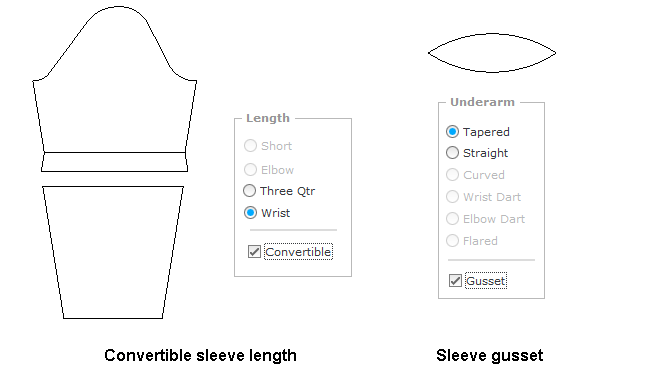
Sleeve Options
Pants
- For pants, the sideseam placket allow the pants to open completely from waist to hem on one or both sides as needed. Choose Full Elastic or Casing for the waistline and Unfitted for the Waist Fit where available to enable the sideseam placket closure option.
- If an opening is not needed from waist to hem, incorporating invisible zippers in either the outseam or inseam from the hemline up to the desired length can help with dressing over a prosthesis or fixator and be completely disguised when closed.
- Choose the Convertible pant style to create pants with leg bottoms that can be added or removed to accommodate prosthesis, casts, or fixators.
- Choose the crotch gusset for pants for improved mobility.
- Use plastic snaps, magnetic closures, or hook and loop tape instead of buttons.
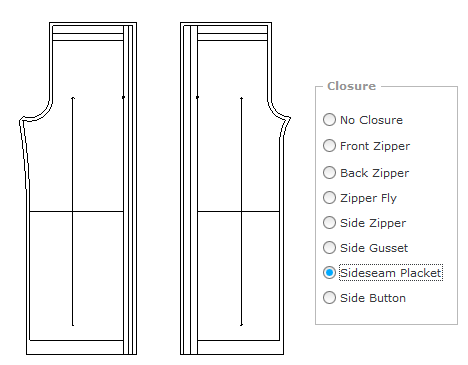
Pants Sideseam Placket
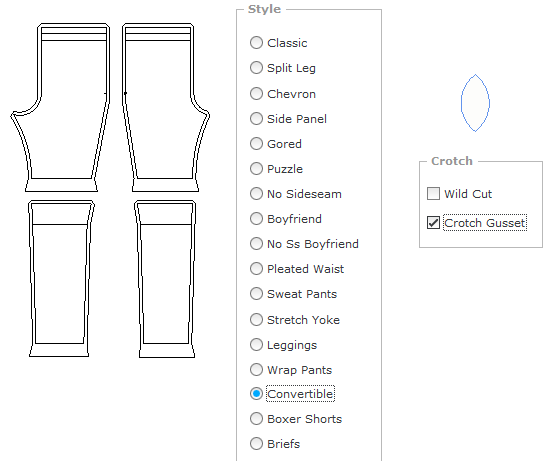
Convertible Length Pants
Zippers are extremely effective in allowing garments to open in unusual places. Zipper can be added into any seamline. Invisible zippers will be virtually unnoticeable. They are a bit more difficult to operate though so use cautiously if mobility is limited. To aid in dressing, tabs or fabric loops can be attached to zipper pulls. Snaps, magnets, and hook and loop tape are also good choices for closures. Grab loops sewn on the inside at each sideseam at the waistline can also aid in pulling on pants and skirts. Hands can be hooked inside the grab loop if finger dexterity is an issue.
The Seated Figure
Clothing is typically designed to look best when we are standing. Body measurements and distribution of padding change when people are seated. As a result, clothing becomes distorted and wrinkled. It changes in location on the body, length, and width when we sit. The front pants hem raises up and back pants hem droops down. The front crotch becomes more snug. The back waist on skirts and pants rides down. The abdomen area bunches up and the buttocks area tightens.
Adjustments to sewing patterns can be made to improve the function, comfort, and the look of clothing when seated. Keep in mind though, that these adjustments will result in patterns and clothing that will look unusual when the wearer is standing. Darts or tucks in unusual places can also improve the look of clothing when seated. If taking deep darts in the back or bottom of the garment, be sure to trim off as much excess fabric as possible to help avoid pressure sores. Following are suggested pattern changes for the seated figure.
Top/Dresses/Jackets
- The center front and center back extension settings can be used to make garments shorter in back and longer in front.
- Choose the Seated Figure option on the Measurement Chart screen to draft darts along the center back seam to make a curved back.
- Front and back closures can be set independently. The shoulder placket, back placket, and back overlap closures make dressing easier.
- The side placket style allows the top to open completely from the sideseam at armscye to the hem. If a sleeve is chosen, a placket will also be drafted along the underarm of the selected sleeve to allow the sleeve to open completely from sleeve hem to armscye.
- For garments that go over the head, increase the front and back neckline depth settings for the jewel neck. The back gusset closure is also useful for allowing extra room for the garment to go over the head.
- Use plastic snaps, magnetic closures, or hook and loop tape instead of buttons.
NOTE: The Seated Figure option is not available in PatternMaster Curves.
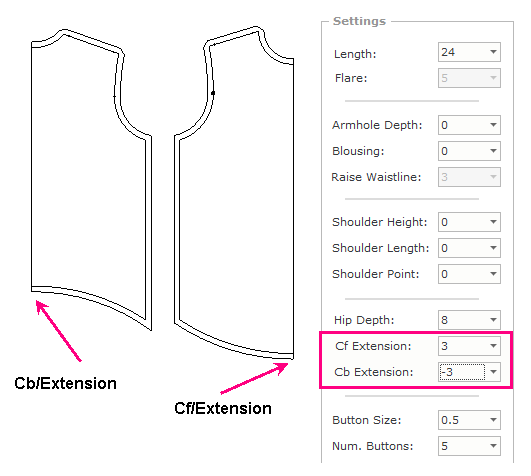
Center Front and Center Back Extension Settings
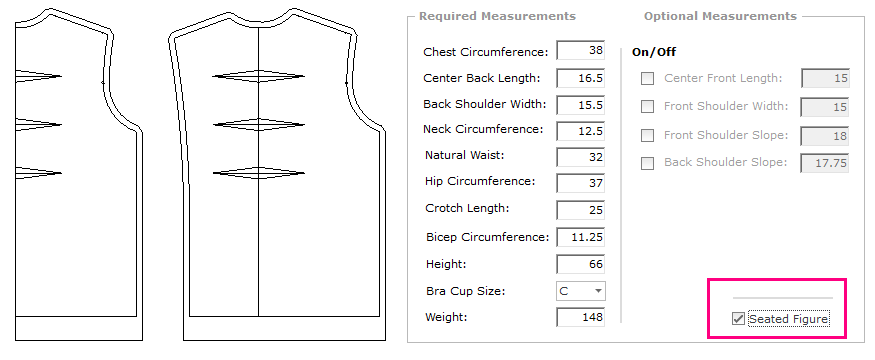
Seated Figure Option - Center Back Darts
Pants/Skirts
- Increase the Cb/Drop setting to raise the center back.
- Decrease the Cf/Drop setting to lower the center front.
- Decrease the Ss/Move setting to decrease the width of the garment across the front and increase the width of the garment across the back.
- For pants, use a negative front crotch extension setting to shorten the front crotch and reduce bulk.
- For pants, use a positive back crotch extension setting to length the back crotch and move the crotch point forward.
- Choose the Seated Figure option on the Measurement Chart screen.
- The seated figure selection will draft optional darts across the front crotch area, at the back hip, and the back knee. These darts provide guides for reducing bulk in these areas. The dart uptake can be larger or smaller than the marked dart as needed.
- The seated figure drafts the pants hem longer in front and shorter in back.
- For skirts, the seated figure option drafts three optional darts along the center back seam to make a curved back.
- Choose the Sideseam Placket or Side Button closures.
- The sideseam placket allow the pants to open completely from waist to hem on one or both sides, as needed. Choose Full Elastic or Casing for the waistline and Unfitted for the Waist fit where available to enable the Sideseam Placket closure.
- If an opening is not needed from waist to hem, incorporating invisible zippers in either the outseam or inseam from the hemline up to the desired length can help with dressing over a prosthesis or fixator and be completely disguised when closed.
- The side button closure provides an opening from the waist to the hip on one or both sides of the garment, as needed.
- Use plastic snaps, magnetic closures, or hook and loop tape instead of buttons.
- For skirts, use the center front and center back extension settings to make the skirt shorter in back and longer in front.
- Choose the Convertible pant style to create pants with leg bottoms that can be added or removed.
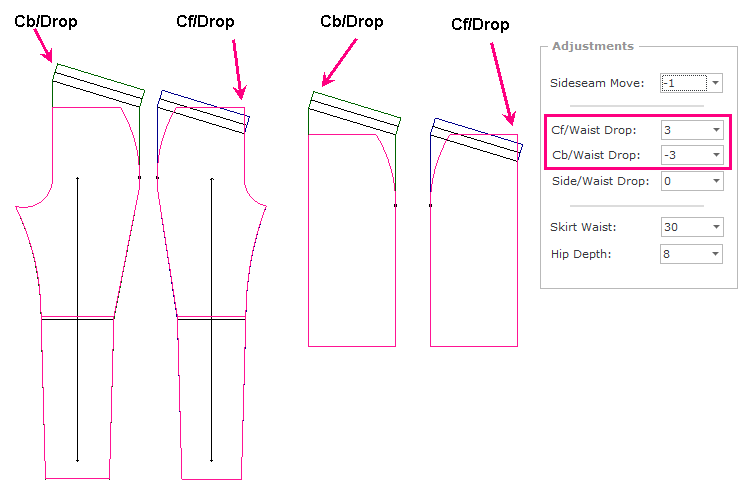
Center Front and Center Back Drop Settings
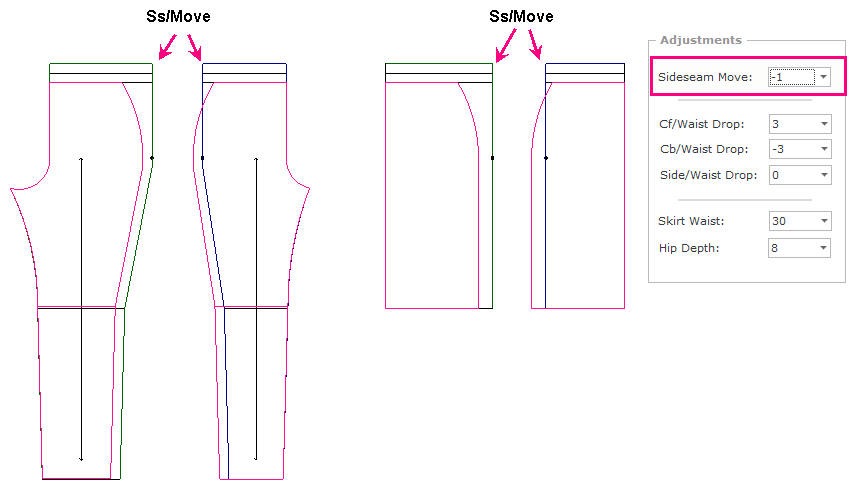
Sideseam Movement Setting
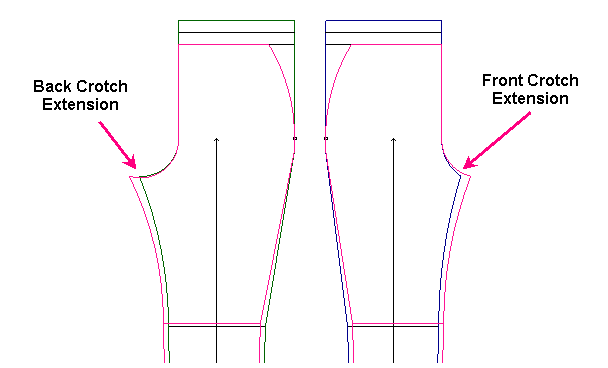
Front and Back Crotch Extension Settings
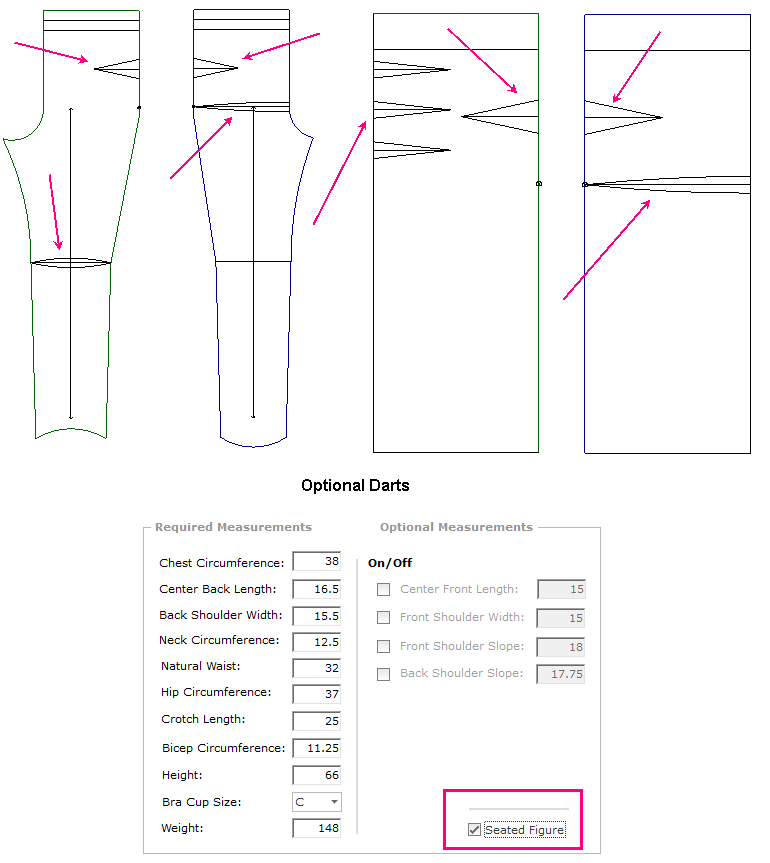
Seated Figure - Pants/Skirts Options
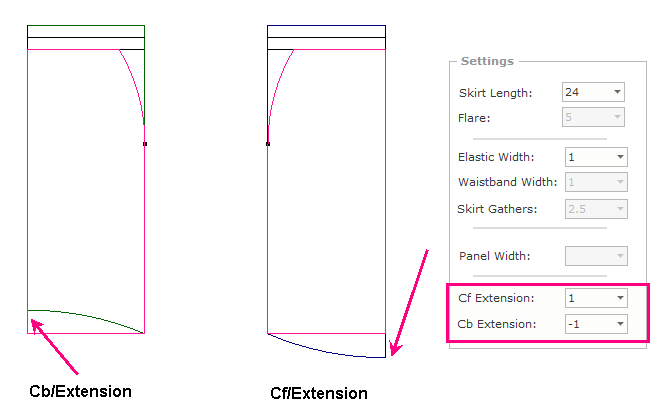
Center Front and Center Back Extension Settings
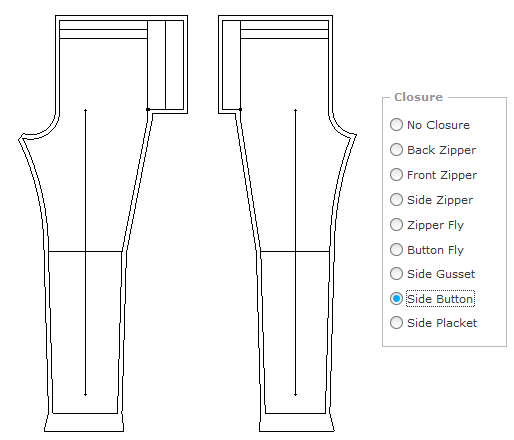
Side Button Closure


