


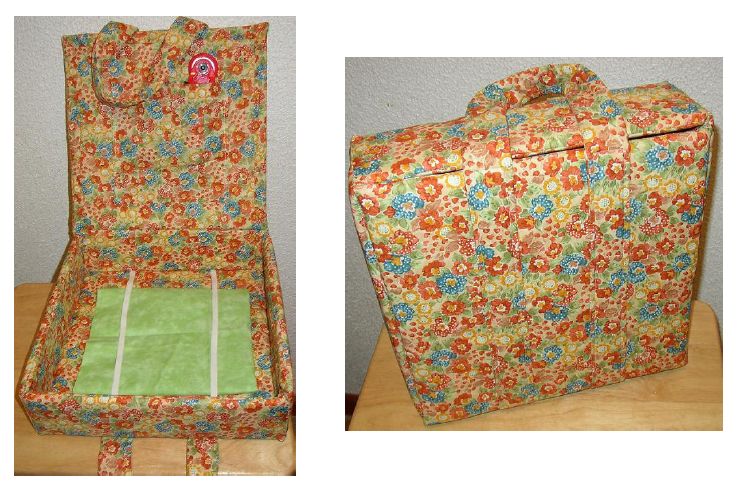
Quilt Block Tote by Shelley Doyal
This is a hard sided tote bag made with a pocket in the lid to carry your rotary cutter or other supplies. It also has elastic to hold 12” quilt blocks flat without wrinkling.
Draft and Print the Patterns
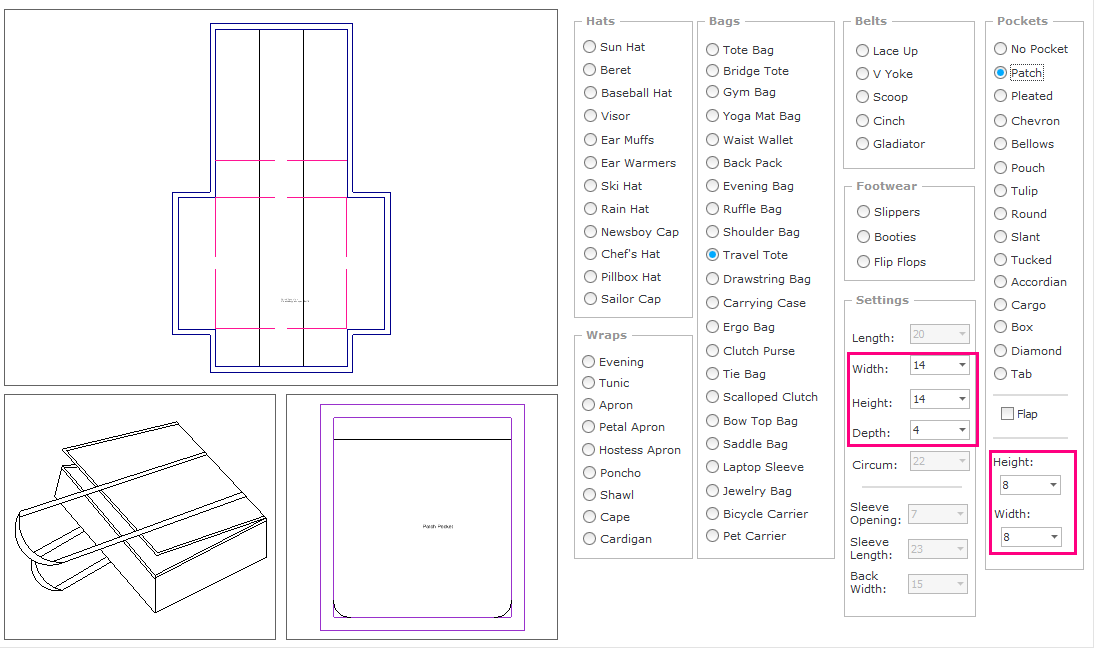
- Launch Wild Things and go to Create Patterns.
- Choose Travel Tote and make the bag height and width 14 in. Make the bag depth 4 in.
- In Pocket Style choose Patch and make the height and width 8 in.
- Press the Next button on the Create Patterns screen and the press the Print button on the Finish Patterns screen.
- Print and assemble the patterns.
Assemble the Bag
- Cut one each of fabric for the outside of the bag, the lining and the batting 38 in x 25 in.
- Cut strips for the handle 22.5 in wide by the desired length of the handles. (Optional batting may be put into the straps. Cut batting the same size as the straps.)
- Cut a strip approximately 110 in x 2.5 in for the binding around the top of the quilt block tote bag.
- Cut two pieces 5.5 in x 2 in to make the flap for the Velcro closure.
- With a water soluable marker,on the right side of the fabric mark the strap lines and the fold lines from the pattern. These will form the sides.
- Make the straps. Turn right side out and press.
- Lay the outside bag fabric face up on top of the batting.
- Stitch the straps onto the bag, centering the straps on the line drawn on the bag.
- Right sides together, stitch the 5.5 in x 2 in pieces together and turn right side out. Stitch a small piece of Velcro to the flap. Position this piece between the straps with the half of the flap that has the Velcro over the edge of the bag.
- Cut the following pieces of foam board to be inserted into the tote bag- 2 pieces 13 in x 13 in, 4 pieces 13 in x 3.5 in.
- Cut out the pocket and sew onto the lining piece on the lid.
- Cut two pieces of elastic 15 in long to form the holders for the quilt blocks on the inside of the tote bag. Place the elastic 4 in in from the fold lines that form the sides of the bag and stitch on the sewing machine.
- Place lining right side down. Place only one of the 13 in x 13 in foam board pieces in place and place the bag top right side up to sandwich the foam board in between. Pin the fabric to the lining to encase the foam board. Use the zipper foot to sew all the way around the foam board.
- Stitch the fold line that forms the bottom of the other 13 in x 13 in section.
- Place the other 13 in x 13 in foam board in place. Pin around the remaining three sides to encase the foam board and stitch.
- Slide in a piece of the 13 in x 3.5 in foam board in the slot between the two 13 in x 13 in pieces.
- Pin the other 3 pieces of 13 in x 3.5 in foam board into the sides. Stitch around the edges.
- Take the strip of 110 in x 2.5 in, fold in half wrong sides together and press. This will form the binding around all the edges of the tote. On the right side stitch the binding all the way around the tote bag. Trim the seam.
- Hand stitch the edges around the bag. Fold up the sides to form the bag and sew each of the four corners by hand.
- Hand stitch the piece of Velcro in place where the flap overlaps.