


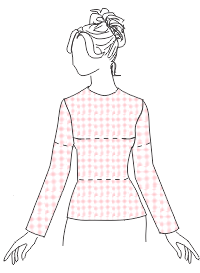
Drafting a Knit Sleeve
The knit sleeve has a shorter sleeve cap than the fitted classic sleeve. The cap height and cap ease are varied as desired. The underarm seam and hemline can be styled as desired.
This project assumes you have completed the Dartless Knit Sloper project.
Dartless Knit Sloper
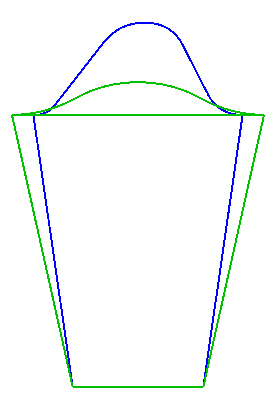
Woven Sleeve (blue) vs Knit Sleeve (green)
Draw the New Bicep Line
- Choose Open (FO) and open the dartless knit sloper.
- Select the two armscye curves and record the measurement displayed on the command line.
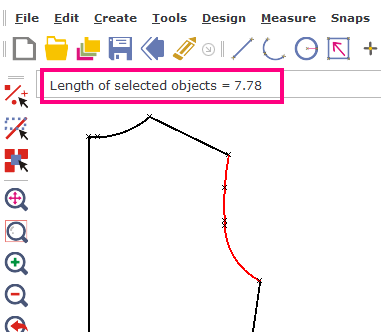
Figure 1. Measure the armhole
- Choose Open (FO) and open the classic style drafted with the set in sleeve.
- Select and delete the front and back patterns.
- Select and delete the front and back sleeve cap.
- Choose File/Save As (FA) and save the sleeve as Knit Sleeve.
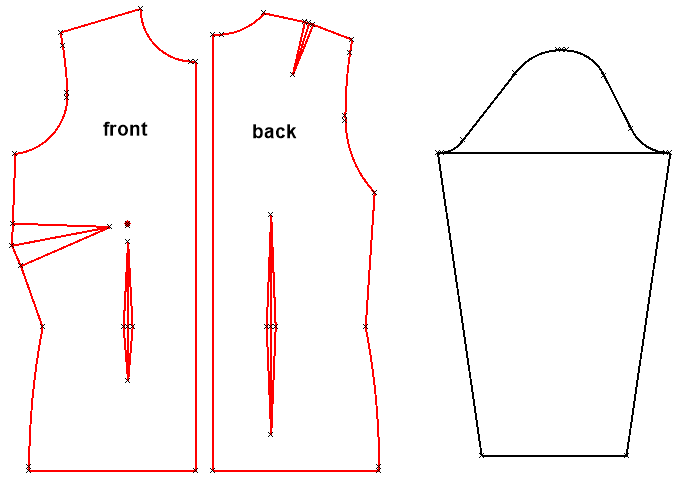
Figure 2. Delete front and back patterns
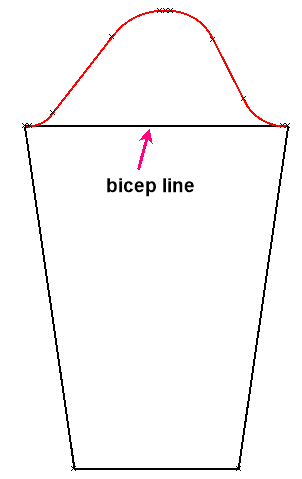
Figure 3. Delete sleeve cap
- To draw the biceps line, select the existing bicep line and choose Locate Mid (LM).
- Choose Scissors (BR).
- CLICK on the bicep line.
- SNAP twice to the point placed on the bicep line.
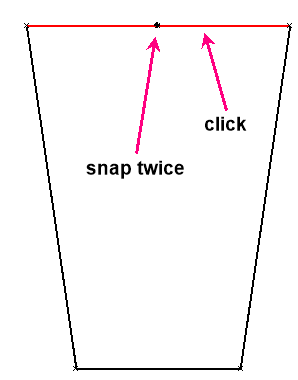
Figure 4. Locate mid point on bicep line
- Choose Line (LI) and SNAP to the mid point on the bicep line.
- Hold the CTRL key down and drag the mouse UP.
- Release the CTRL key and type 2 (or desired cap height) on the keyboard and press Enter.
- Select and delete the standard point.
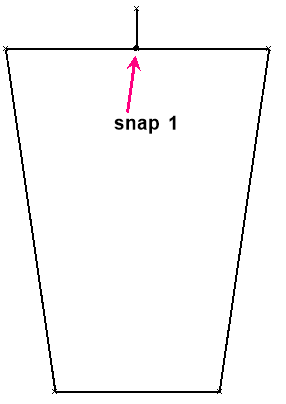
Figure 5. Draw new cap height
Draw the Sleeve Cap
- Choose Line (LI) and SNAP to point 1 and SNAP to point 2.
- Choose Line (LI) and SNAP to point 1 and SNAP to point 3.
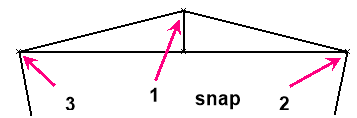
Figure 6. Draw front and back sleeve cap lines
- To increase the width of the bicep line, select the BACK bicep line and choose Locate Points (LP)
- SNAP to the mid point of the bicep.
- Enter the measured armhole length and press Apply.
- Repeat to locate the point for the FRONT bicep line.
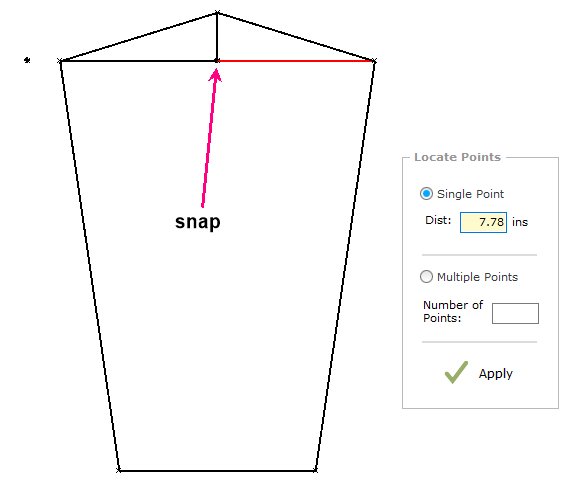
Figure 7. Locate points on the bicep line
- Choose Move Point (MP) and SNAP to point 1 and SNAP to point 2.
- Choose Move Point (MP) and SNAP to point 3 and SNAP to point 4.
- Select and delete the two standard points.
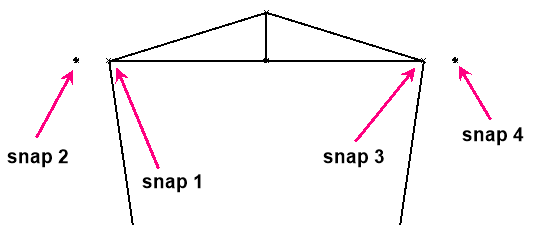
Figure 8. Move points
- Select the FRONT sleeve cap line just drawn (RIGHT side) and choose Segment (SG).
- Enter 4 for the number of segments and press Apply.
- Select the BACK sleeve cap line just drawn (LEFT side) and choose Segment (SG).
- Enter 4 for the number of segments and press Apply.
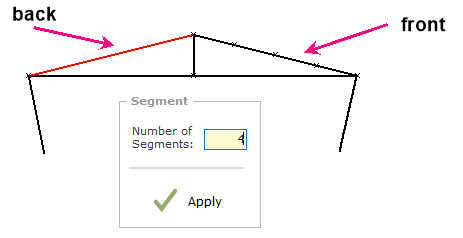
Figure 9. Segment the sleeve cap lines
- Select line segment 1 on the FRONT sleeve cap and choose Square Line (SQ).
- SNAP to point 1.
- Enter 0.25 (0.6 cm) for the distance and press Apply.
- Press the Flip button on the Square Line docker to flip the notch below the line segment.
- Select line segment 2 on the BACK sleeve cap and choose Square Line (SQ).
- SNAP to point 2.
- Enter 0.25 (0.6 cm) for the distance and press Apply.
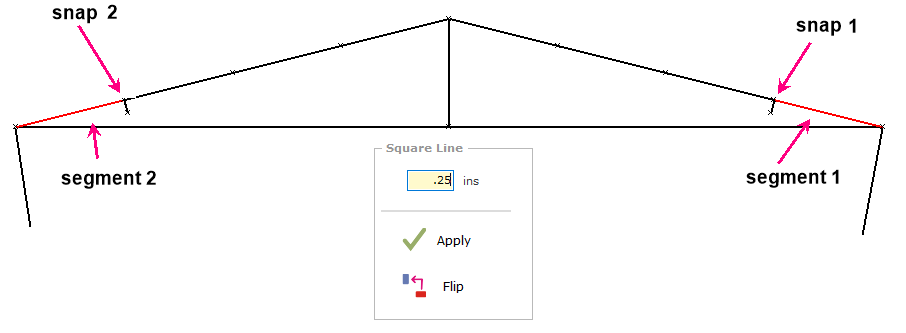
Figure 10. Square Line
- To draw the lower FRONT sleeve cap, choose Arc (AR).
- SNAP to point 1, point 2, and point 3.
- To draw the lower BACK sleeve cap, choose Arc (AR).
- SNAP to point 4, point 5, and point 6.
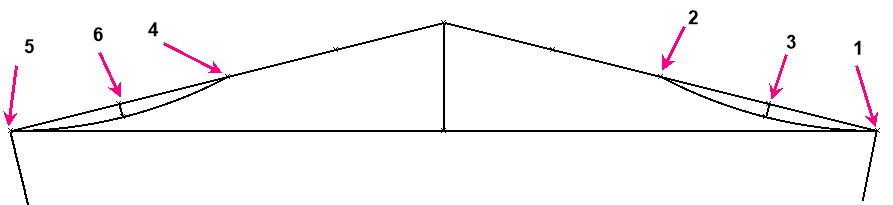
Figure 11. Draw front sleeve cap
- To draw the upper FRONT sleeve cap, choose Arc (AR).
- SNAP to point 2 and SNAP to point 1.
- Hold the CTRL key down and drag the mouse to the RIGHT
- Release the CTRL key, type 0.25 (0.6 cm) and press the Enter key to place point 3.
- To draw the upper BACK sleeve cap, choose Arc (AR).
- SNAP to point 4 and SNAP to point 1.
- Hold the CTRL key down and drag the mouse to the LEFT.
- Release the CTRL key, type 0.25 (0.6 cm) and press the Enter key to place point 5.
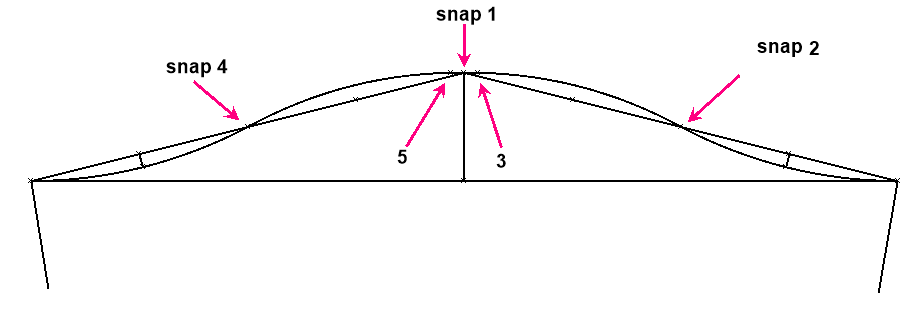
Figure 12. Draw back sleeve cap
- Select and delete the objects as shown.
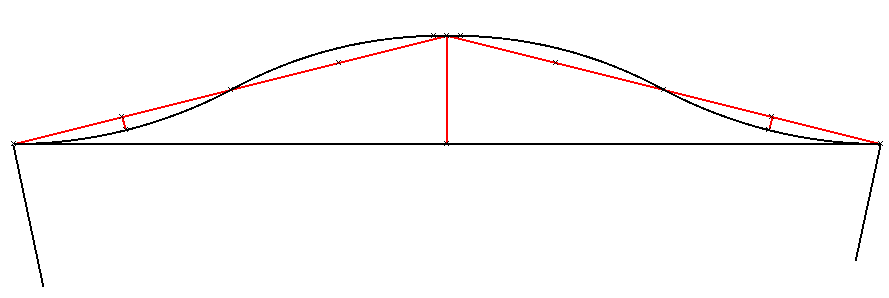
Figure 13. Select and delete objects.

Figure 14. The final pattern