


Princess Sheath with Cut-0n Pocket
This project will teach you to add a cut-on front pocket to a princess sheath style.
Princess Sheath with Cut-on Pocket
Draft the Patterns
- In the PatternMaster of your choice, draft a blouse, top, jacket, or sheath with a shoulder princess, armscye princess, or neckline princess front dart.
- Set the seam allowances to 0.
- Set the desired garment length. This style works best is the garment is at least 4 inches (10 cm) below the hip depth.
- Save the patterns and then choose Open Patterns in Pattern Editor.
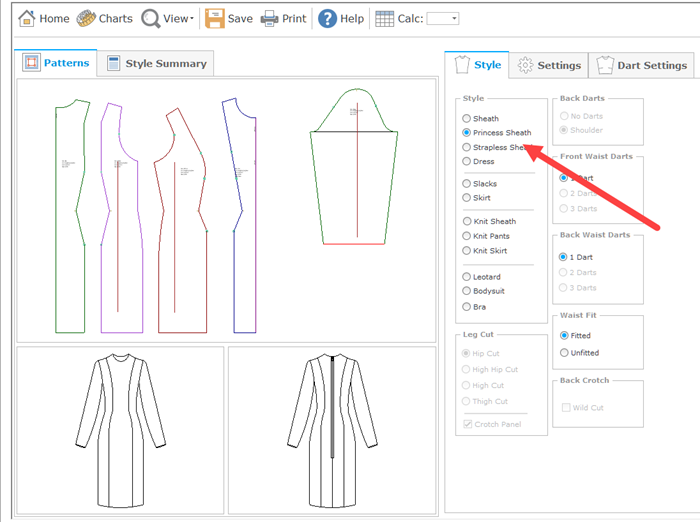
Figure 1. Front Princess Darts
Set Up the Patterns
- In Pattern Editor, open the princess sheath saved torso patterns and ungroup the patterns if they are not already ungrouped.
- Select and delete the rectangular marking symbols on the princess style lines (Fig. 2).
- Select and delete the grainline on the side front.
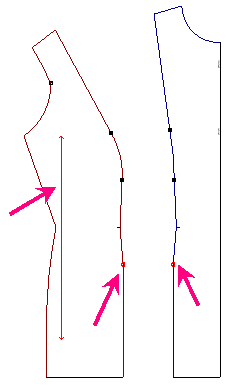
Figure 2. Select and delete objects
- Save the file (Ctrl S).
- Choose Select All (SA) and then choose Copy (CO). (I like to work on a copy and keep the original patterns for reference.)
- Enter 1 for the number of copies and press Apply.
- Drag the copy to the right of the selected objects (Fig. 3).
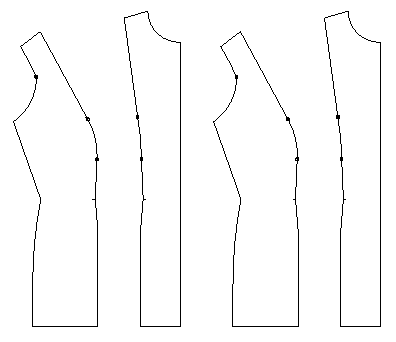
Figure 3. Make a copy
- Save the file (Ctrl S).
Draw the Style Line
- On the side front, use the Line (LI) or Arc (AR) commands to draw the desired shape of the pocket opening.
Figure 4 shows illustrates some of the options.
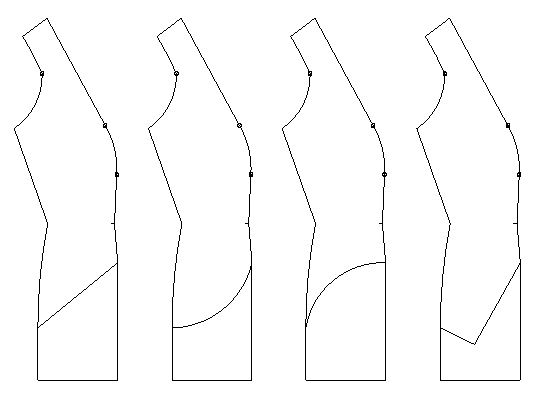
Figure 4. Style line options
- Choose the Copy (CO) tool and make one copy of the object(s) just drawn directly on top of themselves by
snapping TWICE to point 1.

Figure 5. Copy the style line
- Hold the SHIFT key down and CLICK to select one copy of the pocket opening, the two lower seam lines, the
lower hem. The selected objects will turn red.
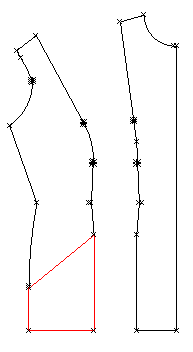
Figure 6. Selected objects turn RED
- Drag the mouse to move the selected objects down away from the upper side front. (Fig. 7)
- Click down anywhere on the screen to deselect the objects.
- You now have three main pieces making up the front of the garment.
- Save the file (Ctrl S).
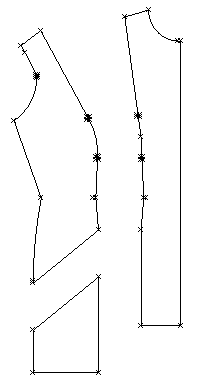
Figure 7. Three patterns
Complete the Front
- Draw a selection window around the lower side front.
- SNAP with the right mouse button to point 1 in Figure 8. Drag the objects near to the center front and SNAP with the right mouse button to point 2 in Figure 8.
- Select and delete the two lower lines on the bodice front (Fig. 8a).
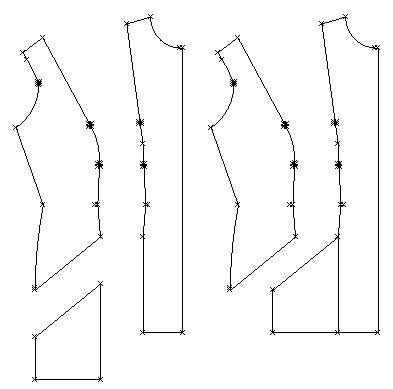
Figure 8
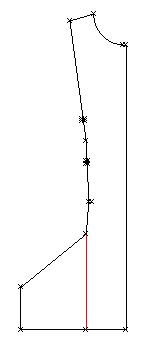
Figure 8a
Make the Pocket Bag
- Draw the desired shape of the pocket bag as shown in Figure 9. The bag can be rounded or rectangular as desired.
Just make sure it does not hang lower than the hemline.
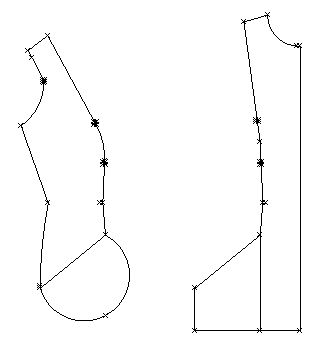
Figure 9. Draw the pocket bag
- Select the pocket top style line and the pocket bag.
- Choose the Copy (CO) tool and make one copy offsetting it off to one side of the side front (Fig. 10).
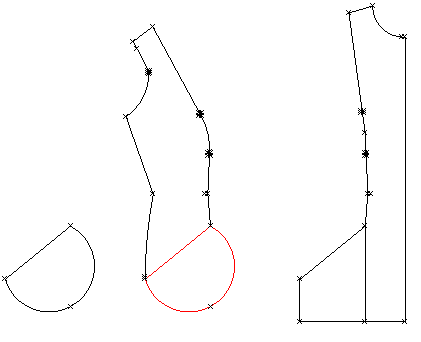
Figure 10. Copy the pocket bag
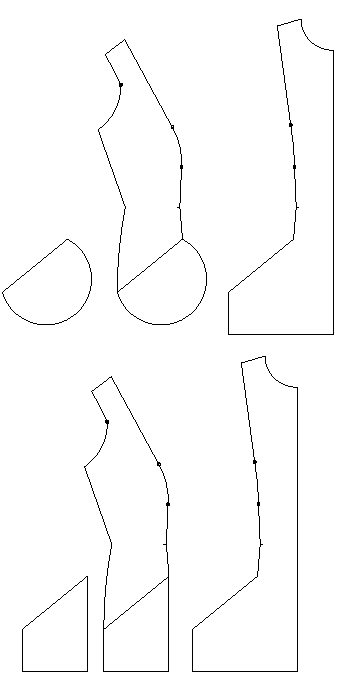
Figure 11
Finish the Patterns
- Use the Offset (OF) tool to add the seam allowances to the front, side front, and pocket bag.
- Use the Intersect (IN) tool to complete the seam allowances (Fig. 12).
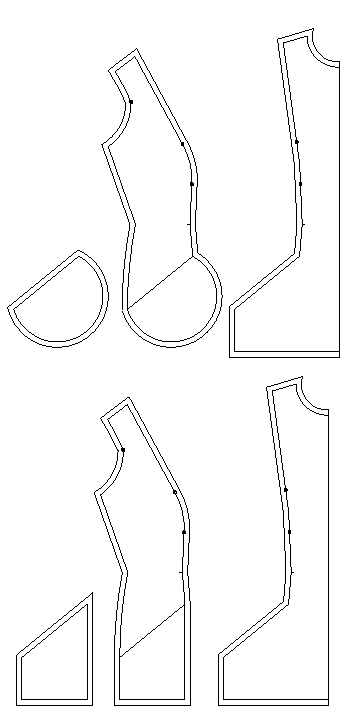
Figure 12
Construct the Pocket
- To construct your front, sew the pocket bag to the Front/Lower Side Front piece, right sides together and then flip to the wrong side.
- Sew the pocket bag to the pocket on the Upper Side Front Piece and sew the princess seam above the hip line.
- Sew a few security stitches attaching the upper and lower pieces at the pocket side.
- Continue as for any sheath dress with sleeves/facings or whatever your style selections were.